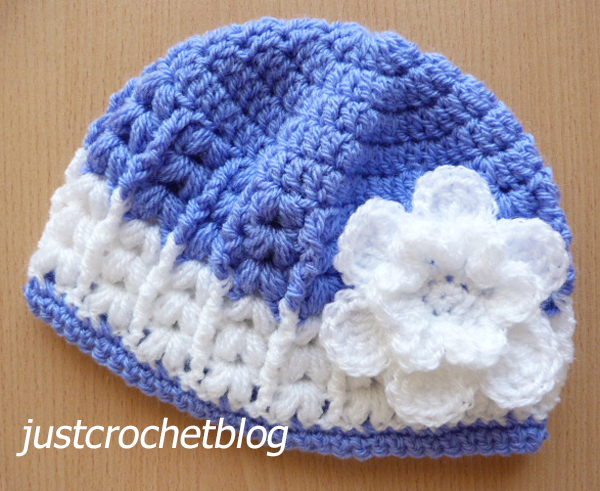
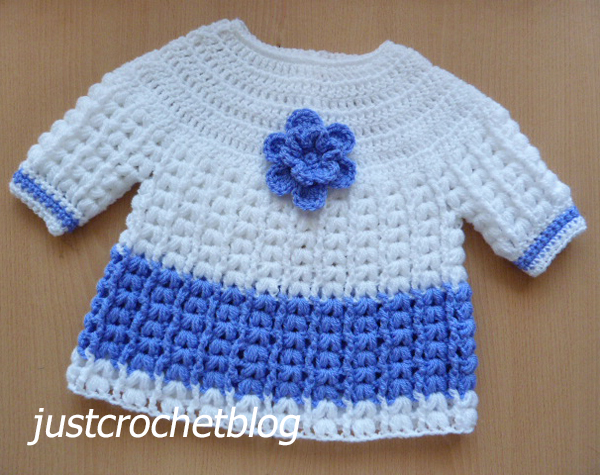
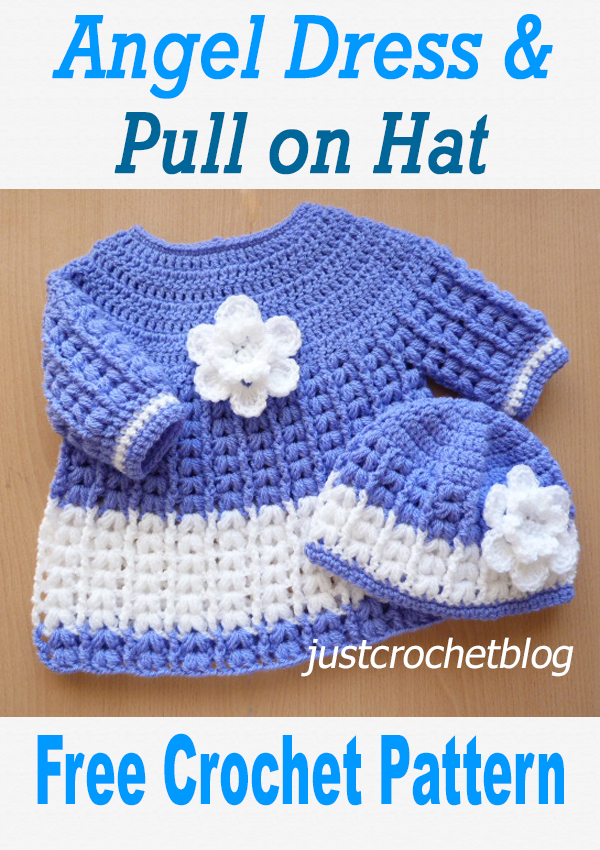
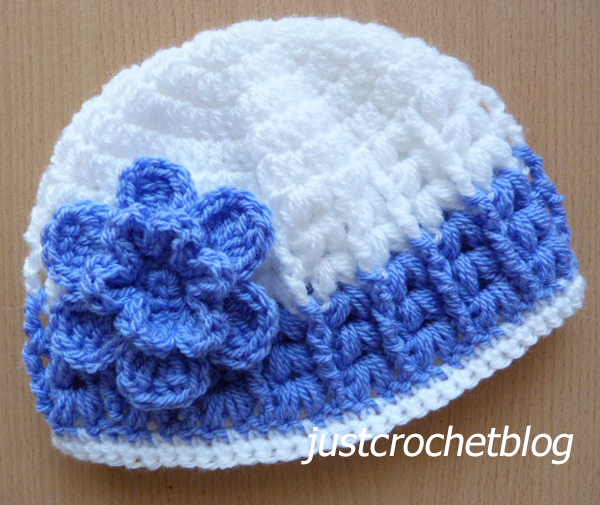
Crochet angel dress-hat, a free crochet pattern for a 3-6 month baby, made in a worsted weight #3 yarn on a 4.50mm crochet hook.

Disclaimer: This site contains affiliate links. If you make a purchase after clicking on an affiliate link, I may receive a small commission (at no extra expense to you)

The materials used for the sample were Stylecraft Special DK yarn and using a 4.50mm Clover crochet hook

********
Crochet Angel Dress-Hat
Scroll down the page for FREE pattern
Find all my FREE crochet patterns HERE
Pattern number 152BFJC
USA Format
Abbreviations
WS. Wrong Side
RS. Right Side
ch. Chain
sc. Single Crochet
dc. Double Crochet
trc. Treble Crochet
rpt. Repeat
sl st. Slip Stitch
yo. Yarn Over
Inc. Increase
ps. Puff Stitch yo, insert hook in next space, pull up loop (3 times), yo and pull through 6 loops, yo and pull through 2 loops.
ps Group. (1ps, ch1, 1ps) in same stitch or space
fptrc. Work trc around front post of the trc on row below
bptrc. Work trc around back post of the trc on row below
Base of ch. Work in first stitch
ch3 counts as first dc
Size to fit approx: 18 Inch Chest, 3-6 month Baby
Finished length from shoulder approx 12.5 Inches
Sleeve length from under arm to cuff 3.5 Inches
Materials
130 grams of Stylecraft Special DK in Color 1
60 grams of Stylecraft Special DK in Color 2
OR
4.58oz of Worsted Weight #3 yarn in Color 1
2.15oz of Worsted Weight #3 yarn in Color 2
4.50mm crochet hook
4 small buttons
GAUGE – 4dc and 2 rows measures approx 1 Inch
**************************************************************************************************
crochet angel dress-hat
Worked in one piece starting with yoke. With color 1 ch56, 1dc in 4th ch from hook, 1dc in each ch to end. Turn. (53dc + ch3)
Row 2 – (Inc) ch3, 1dc in each of next 3dc, * 2dc in next dc, 1dc in each of the next 4dc, * rpt from * to * to last 4dc and ch3, 2dc in next dc, 1dc in each of last 3dc, 1dc in top of ch3. Turn. (63dc + ch3)
Row 3 – ch3, 1dc in each dc to end, 1dc in top of ch3. Turn.
Row 4 – (Inc) ch3, 1dc in each of next 3dc, * 2dc in next dc, 1dc in each of the next 3dc, * rpt from * to * to last 3dc and ch3, 2dc in next dc, 1dc in each of last 2dc, 1dc in top of ch3. Turn. (78dc + ch3)
Row 5 – As row 3.
Row 6 – (Inc) ch3, 1dc in each of next 2dc, * 2dc in next dc, 1dc in each of the next 2dc, * rpt from * to * to end, 1dc in top of ch3. Turn. (103dc + ch3)
Row 7 – As row 3.
Row 8 – (Inc) ch3, 1dc in next dc, * 2dc in next dc, 1dc in each of next 2dc, * rpt from * to * to last 2dc and ch3, 2dc in next dc, 1dc in next dc, 1dc in top of ch3. Turn. (137dc + ch3)
Commence with Skirt – ch3, * skip 1dc, (1ps, ch1, 1ps) in next dc, skip 1dc, 1dc in next dc, rpt from * to * to last 4dc and ch3, skip 1dc, (1ps, ch1, 1ps) in next dc, skip 2dc, 1dc in top of ch3. Turn. (34 ps groups). (see abbrev for ps)
2nd Row – ch3, * (1ps, ch1, 1ps) in ch1 space of next ps group, bptrc around next dc, * rpt from * to * to last ps group and ch3, (1ps, ch1, 1ps) in ch1 space of ps group, 1dc in top of ch3. Turn.
3rd Row – ch3, * (1ps, ch1, 1ps) in ch1 space of next ps group, fptrc around next trc, * rpt from * to * to last ps group and ch3, (1ps, ch1, 1ps) in ch1 space of ps group, 1dc in top of ch3, sl st to top of ch3 on beginning of row to make a round. Turn.
4th Row – (Divide for Armholes)
ch3, * (1ps, ch1, 1ps) in ch1 space of ps group, bptrc around next trc, * rpt from * to * (4 more times),
1ps, ch1 in space between trc and next ps group, skip 7 ps groups, 1ps in space between ps group and trc, bptrc around next trc, * rpt from * to * (10 more times),
1ps, ch1, in space between trc and next ps group, skip 7 ps groups, 1ps in space between next ps group and trc, bptrc around next trc, * rpt from * to * (4 more times),
(1ps, ch1, 1ps) in ch1 space of ps group, sl st to top of ch3 on beginning of row. Turn.
5th Row – ch3, * (1ps, ch1, 1ps) in ch1 space of next ps group, fptrc around next trc, * rpt from * to * to last ps group, (1ps, ch1, 1ps) in ch1 space of ps group, sl st to top of ch3 on beginning of row. Turn. (22 ps groups)
6th Row – ch3, * (1ps, ch1, 1ps) in ch1 space of next ps group, bptrc around next trc, * rpt from * to * to last ps group, (1ps, ch1, 1ps) in ch1 space of ps group, sl st to top of ch3 on beginning of row. Turn.
7th Row – ch4, * (1ps, ch1, 1ps) in ch1 space of next ps group, ch1, fptrc around next trc, ch1, * rpt from * to * to last ps group, (1ps, ch1, 1ps) in ch1 space of ps group, ch1, sl st to 3rd of ch4 on beginning of row. Fasten off. Turn.
8th Row – Join in color 2, ch4, * (1ps, ch1, 1ps) in ch1 space of next ps group, ch1, bptrc around next trc, ch1, * rpt from * to * to last ps group, (1ps, ch1, 1ps) in ch1 space of ps group, ch1, sl st to top of ch3 on beginning of row. Turn.
Rpt 7th and 8th Rows twice, rpt 7th Row once. Fasten off. Turn.
Join in color 1, rpt 8th Row once, rpt 7th Row once. Fasten off.
Sleeves x 2 – With WS facing join color 1 in same space underarm before ps group, ch3, * (1ps, ch1, 1ps) in ch1 space of next ps group, bptrc around next trc, * rpt from * to * to last ps group, (1ps, ch1, 1ps) in ch1 space of last ps group, sl st to top of ch3 on beginning of row. Turn. (7 ps groups). (There will be a small gap formed, you will close this in the finishing section)
Next Row – ch3, * (1ps, ch1, 1ps) in ch1 space of next ps group, fptrc around next trc, * rpt from * to * to last ps group, (1ps, ch1, 1ps) in ch1 space of ps group, sl st to top of ch3 on beginning of row. Turn.
Next Row – ch3, * (1ps, ch1, 1ps) in ch1 space of next ps group, bptrc around next trc, * rpt from * to * to last ps group, (1ps, ch1, 1ps) in ch1 space of ps group, sl st to top of ch3 on beginning of row. Turn.
Next Row – ch3, * (1ps, ch1, 1ps) in ch1 space of next ps group, fptrc around next trc, * rpt from * to * to last ps group, (1ps, ch1, 1ps) in ch1 space of ps group, sl st to top of ch3 on beginning of row. Turn.
Cuff – ch1, 1sc in base of ch1, skipping all ch1 spaces, work 1sc in each stitch to end, sl st to first sc on beginning of row. Fasten off. Turn. (21sc)
Join in color 2, ch1, 1sc in base of ch1, 1sc in each sc to end, sl st to first sc on beginning of row. Turn.
Rpt last row once. Fasten off.
Join in color 1 and rpt last row twice. Fasten off.
Button & Buttonhole Bands – With back of dress facing, join color 1 to lower edge on right hand side at base of opening, ch1, 1sc in base of ch1, 2sc in each row end to neck edge, 3sc in corner, 1sc in each ch around neck, 3sc in corner, 2sc in each row end down second back edge. Turn.
Next Row – ch1, 1sc in base of ch1, work 1sc in each sc to neck edge, 1sc in centre sc of 3sc on corner. Turn. (25sc)
Next Row – ch1, 1sc in base of ch1, 1sc in each sc to end. Fasten off.
Buttonhole Band – Return to first back edge and working from neck down with WS facing, join color 1 to centre sc of 3sc on corner, ch1, 1sc in base of ch1, * ch2, skip 1sc, 1sc in each of next 6sc, * rpt from * to * twice more, ch2, skip 1sc, 1sc in remaining sc. Turn. (4 buttonholes)
Next Row – ch1, 1sc in base of ch1, 1sc in each ch2 space and sc to end. Fasten off.
Pull on Hat – Made in rounds without turning until Row 6
# With color 1, ch6 and join with a sl st to form a ring, ch3, work 13dc in ring, join with sl st to top of ch3 on beginning of row.
Row 2 – ch3, 1dc in base of ch3, 2dc in each of next 13dc, sl st to top of ch3 on beginning of row. (27dc + ch3)
Row 3 – ch3, 1dc in base of ch3, 1dc in next dc, * 2dc in next dc, 1dc in next dc, * rpt from * to * to end, sl st to top of ch3 on beginning of row. (41dc + ch3)
Row 4 – ch3, 1dc in base of ch3, 1dc in each of next 2dc, * 2dc in next dc, 1dc in each of next 2dc, * rpt from * to * to end, sl st to top of ch3 on beginning of row. (55dc + ch3)
Row 5 – ch3, 1dc in base of ch3, 1dc in each of next 7dc, * 2dc in next dc, 1dc in each of next 7dc, * rpt from * to * to end, sl st to top of ch3 on beginning of row. (62dc + ch3)
Row 6 – ch3, * skip 1dc, (1ps, ch1, 1ps) in next dc, skip 1dc, 1dc in next dc, * rpt from * to * to last 2dc, skip 1dc, (1ps, ch1, 1ps) in next dc, sl st to top of ch3 on beginning of row. Turn.
Row 7 – ch3, * (1ps, ch1, 1ps) in ch1 space of next ps group, bptrc around next dc, * rpt from * to * to last ps group, (1ps, ch1, 1ps) in ch1 space of ps group, sl st to top of ch3 on beginning of row. Turn.
Row 8 – ch3, * (1ps, ch1, 1ps) in ch1 space of next ps group, fptrc around next trc, * rpt from * to * to last ps group, (1ps, ch1, 1ps) in ch1 space of ps group, sl st to top of ch3 on beginning of row. Fasten off. Turn.
Row 9 – Join in color 2, ch3, * (1ps, ch1, 1ps) in ch1 space of next ps group, bptrc around next trc, * rpt from * to * to last ps group, (1ps, ch1, 1ps) in ch1 space of ps group, sl st to top of ch3 on beginning of row. Turn.
Rpt Rows 8 & 9. Fasten off.
Row 12 – Join in color 1, ch1, 1sc in base of ch1, 1sc in each ps and ch1 space to end, sl st to first sc on beginning of row. (63sc)
Starting with ch1, 1sc in base of ch1, work one more row of 1sc in each sc to end, sl st to first sc on beginning of row. Fasten off.
Layered Petals Flower Motif x 2 –
For the flower motif please Click Here
Finishing – Close small gap underarms, weave in and trim off all loose ends of yarn, sew on buttons to correspond with buttonholes, attach layered petal flower motif to front of dress and hat.
Hope you enjoy this free crochet angel dress-hat baby pattern, don’t forget to pin!

Happy crocheting

All pattern sizing, yarn weights, gauges etc are approximate. Every effort is made to ensure this crochet angel dress-hat pattern is correct, but I am only human so mistakes may be made, if you find one please let me know.
The written instructions and pictures for this crochet angel dress-hat pattern are copyrighted to justcrochet © 2017
Please do not re-post any of the text or pictures from this crochet angel dress-hat on other websites or use any as your own. If you do make and sell the finished items from this crochet angel dress-hat, please give credit to justcrochet as the designer and put a link back to this website.
crochet angel dress-hat pattern


I just wanted to “Thank You” so much for the free patterns. That is so nice of you to share your fantastic work. I make baby hats for the nursery in our local hospital. Your patterns are a God send. That way all the hats aren’t just the same. The new moms love them. I always give you credit for the design.
Thank you so much!
Ruth
Your welcome Ruth, glad my patterns are being put to good use.